Tag Archives: Kitchen

That Sauce: Finger Lickin’ Date Sauce

Standard

In Florida, we look forward to fall as it means, cooler, beautiful weather, unlike the 90 degree plus humidity temps we are used to all summer long. With that comes all those delicious fall festivals and good eats! I am a sucker for all things fall since I grew up in Atlanta, and just a short drive to Ellijay, GA where all the fabulous apple festivals are held.

It has become a tradition that our family will enjoy dinner in our little quaint downtown area in Winter Garden, FL and feast on great delicacies at Plant Street Market. Inside this great market is Press’d Juice Bar & Kitchen.  I had the wonderful opportunity to have one of their fall smoothies, the Pumpkin Spice Smoothie. To describe to you the burst of raw, vegan delicious flavor would be a travesty as it is one you must personally experience. However, the real surprise was the “caramel sauce” that was drizzled on top. Being Press’d Juice Bar is a vegan bar, I knew this was no ordinary sauce. When I asked what they were drizzling on top of the smoothie, the sweet gal responded that it was “date sauce.”

While I am an all thing organic, fresh, healthy, sometimes raw kind of gal, I have never heard of this!

After I slurped and practically licked my cup clean from that incredible smoothie, I raced home to experiment in making this date sauce. After a few moments surfing the net, I came up with what I feel is a very close recipe to what I experienced in the pumpkin smoothie from Press’d Juice Bar. 

14589655_10211131793034920_4407711712478808080_o

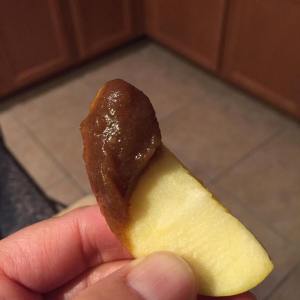
My date sauce whipped up so nicely that it took on the form of a thick, gooey caramel sauce that is absolutely finger licking delicious! Of course the real test came when I offered a plate of sliced tart apples to my teenage boys with a bowl of “caramel sauce” for dipping.

14721694_10211133549918841_2201354351298578124_n

Needless to say, this will be a new staple in our house and the possibilities are endless!

I am a scratch cook sometimes when it comes to experimenting in the kitchen, therefore my recipe has no measured ingredients.

Vegan Date Sauce

3 Handfuls of organic dried pitted Dates

Water

Organic Vanilla Bean (or Organic Vanilla Extract)

Soak dates in water that just covers them for 8-12 hours OR to speed up the process, boil water and pour over dates to just cover them until they get soft. Once they are good and soft, dump the date mixture, and add vanilla bean to the Vitamix. Pulse a few times, then slowly blend increasing intensity and adding water as needed. If you want a thicker sauce, stop when desired consistency is achieved. For a thinner sauce, add water. Blend til smooth and creamy. 

ENJOY!

Fall Recipes: Scottish Scones & White Chicken Chili

Standard

With fall in the air and cool afternoon breezes, it’s time for some fall food! Wait…..  I live in Florida!!!! It is never cool here, but it was a nice thought even if it was just for a moment!

There is something to be said for fall food, even if it is 80 degrees outside 11 months out of the year. Football and chili just seem to go hand in hand, and there’s always room for desert!

On that note, here are two of my favorite fall foods.

Scottish Scones & White Chicken Chili.

The scones are out of this world, and satisfy any sweet tooth. The White Chicken Chili is exploding with flavor and warms you from the inside out.  I prefer to use all Organic ingredients, but it’s not required.

The recipe for these amazing Scottish Scones comes from my friend Darby, who’s an incredible baker!

Scottish Scones 

10645260_10205000101386461_5624764345835179943_n

Ingredients: 

2- 1/2 c. Flour (All Purpose)

5-1/3 T. Butter, cold & cut into chunks

4 tsp. Baking Powder

2 T. Sugar plus

1/4 tsp. Salt

2 Eggs, beaten

3/4 c. Heaving Cream

1/2 – 1 c. Chocolate Chips

For The Topping:

4 T. Sugar

Heavy Cream

(***You can sub out the chocolate chips for grated orange rind, and dried cranberries***)

Recipe:

Mix dry ingredients in bowl. Cut in butter, until crumbly. Add eggs, cream & chocolate chips.

Mix gently with fork, until mostly mixed.

Spoon mixture into a scone pan (sections) or an iron skillet with the “triangles” that has been sprayed with non stick spray. (I use coconut spray from Trader Joe’s)

OLYMPUS DIGITAL CAMERA

With a basting brush, baste tops of scones with cream (lightly) then sprinkle with sugar.

Bake @ 400 degrees for 12-14 min or until golden on top.

Let cool for about 10 min before removing from the pan.

Serve warm. YUMMO!

Now that we have dessert taken care of, let’s move on to dinner! Doesn’t everyone have dessert BEFORE dinner? This is my personal recipe that I have tweaked many times. Oh and I tend to be one of those “scratch cooks” so bear with me!

White Chicken Chili

10698448_10205030334422268_856411631756283133_n

Ingredients:

4 Organic Chicken Breasts

1 small Onion, chopped

1/4 c. Flour

3-4 cloves Garlic, minced

4-5 T. Butter

1/2 c Milk

4 cans White Navy Beans, drained

2 cans Green Chilies

12 c. Chicken Broth (3 cartons)

* Ground Cumin, to taste

* Chili Powder, to taste

* Paprika, to taste

* Sea Salt, to taste

* Pepper, to taste

1/2 – 1 c. Half & Half

Monterey Jack Cheese, shredded

Fresh Cilantro, chopped

Recipe: 

Boil chicken breasts about 20-30 min or until tender and no longer pink on the inside. Drain and shred or chop chicken. Set aside.

Meanwhile, in a  large stock pot, saute on low/med heat chopped onion & minced garlic in butter. As the butter is melting, add flour and stir well. As you are stirring slowly, pour in milk. Keep stirring until mixture is thick & creamy. Add Navy Beans, green chilies and chicken broth. Add shredded chicken and **spices. Add half & half & cook over low/medium heat, stirring occasionally.

** This is where the “to taste” comes into play. I have followed different recipes for White Chicken Chili, and they almost always come out bland UNTIL I started just adding more spices to taste. To add the spices to your heart’s content. I use a lot of cumin, with a tad less chili powder. 

Serve hot and top with Monterey Jack Cheese and cilantro.

Enjoy!

(Homemade corn bread pairs nicely with the White Chicken Chili)

Organic Summer Bean Salad

Standard


10289887_10203792230310439_3439789195518282865_n

With summer quickly approaching, I have been scrambling for quick side dishes to pair with our meals. There’s nothing worse than firing up the oven, and heating up the entire house when it’s 90 degrees outside. My remedy for this is to serve chilled and or marinated salads. It’s so easy to throw these types of side dishes together at the last minute, and for a crazy busy mom, who’s wearing a hundred plus hats so to speak, this is the winning ticket!

One of my VERY favorite chilled salads to make is Organic Summer Bean Salad aka Garbanzo Bean Salad.  Not only is it super easy, but it’s super fast to make and always a crowd pleaser that can potentially feed many. To speed things up, I use my food processor to quickly chop my peppers. If you’re in the market to buy one, I can positively 100% tell you that the Breville Sous Chef  Food Processor is the BEST hands down. I’ve used several other brands over the years, and none can even compare to this beauty. Once you go the Breville Sous, you don’t go back! Okay back to the salad….. Below is my fabulous crowd pleasing recipe for this must try salad.

Organic Summer Bean Salad

2 cans Organic Garbanzo Beans, drained

1 Organic Red Bell Pepper

1 Bunch Organic Onion

1-2 Garlic Pods

Fresh Organic Cilantro

2/4 c. Olive Oil

1 c. Braggs Vinegar

1-2 T. Raw Unfiltered Honey

2 T. Water

Sea Salt, to taste

Pepper, to taste

Drain the beans in a colander. Meanwhile, remove the middle/seeds from the red pepper, and cut into 3 chunks. Throw into the food processor with the “s” blade and pulse a few times or until the peppers are medium/fine chopped. *I like mine chopped in medium chunks* Now, chop the green onion including the green stems. In a medium bowl, dump the drained beans, add the peppers & onion. Next press 1-2 garlic pods or mince. Then chop the fresh cilantro and add to the bowl. In a separate bowl mix the olive oil, vinegar, honey, water, sea salt & pepper. Whisk til throughly mixed. Pour over the bean salad mixture and toss well. Let stand in refrigerator for 1 plus hours, and serve!

*Note: This chilled salad is better when it’s been marinating for several hours or even overnight.

If your feeling crazy bold (Hot Chic Style) as I normally am, you can add other spices to the mix for a little kick. I like Chipotle Seasoning, Smoked Paprika and even Fajita Seasoning. I often do this to change it up. BE CREATIVE and experiment!

Bon Appetit!

Raw Chic Donut Dreams

Standard

donut

Society makes it so difficult to eat healthy. Yes, it’s a lifestyle change, but everywhere you turn there always seems to be something like donuts staring at you in the face! And they are not just the plain jane cake kind of donuts…. it’s the ooey gooey luscious chocolate frosting with sprinkles kind. The kind that scream EAT ME ! This ever happen to you? Good, glad to know I’m  not the only one .

If you have been following this blog long enough you might start to see a bit of a pattern. It’s no secret that I love food and that goes pretty much for any kind of food too. I do have an obsession with eating healthy, but like most people, sugar is my downfall. *sigh*

I have spoken before about RAW eating and how I try to incorporate it in my meal planning each week. RAW eating still is a bit foreign to me, but when you give it some thought, it’s really NOT thinking out of the box. It’s rather simple, and takes less work. Coming up with recipes, and food selections takes a lot more effort. With RAW, you pretty much just wash and go. Easy Peasy.

Here’s one of my secret weapons. Okay not really a weapon, but one of my absolute favorite kitchen gadgets. I have a fetish for all things kitchen.

May I present to you The Vegetable Spiralizer….

1978753_10203441893912248_1284002491_n

Pretty nifty huh? As you can see, this beauty can take an ordinary zucchini and make RAW vegetable noodles with a simple turn of the crank. When I say this is easy, I mean a three year old can do this! Of course I wouldn’t let small child handle this contraption due to the sharp pieces, but it’s quite simple and takes not time at all to assemble.

The ideas of what you can do are endless, but my very favorite thing to do is make RAW Pad Thai. My entire family loves Chicken Pad Thai, so when I stumbled upon a recipe for an all RAW Vegetable Pad Thai I was intrigued. Here’s my creation:

1901884_10203442359123878_1897540601_n

TA DA! Looking yummy huh? Here’s the break down.

RAW Pad Thai

~ Spiralized Zucchini

~ Spiralized Onion

~ Shredded Purple Cabbage

~ Shredded Carrots

~ Red Pepper Strips

~ Bean Sprouts

~ Sesame Seeds

Peanut Sauce

~ Peanut Butter or Almond Butter

~ Braggs Amino’s

~ Olive Oil

~ Crushed Red Pepper

~ Thai Sauce

Toss all veggies in a large bowl, drizzle with sauce, top with sesame seeds and dinner is served! How easy and delicious is that? Crunchy but bursting with flavor!

If you’re wondering where to purchase a good spiralizer, just click on this link:  Amazon.  

Bon Appetit!

Green Up

Standard

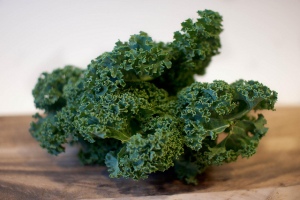
Kale-by-Bstar2

You hear a lot about green smoothies, green drinks and not always do they sound or look good. Honestly I didn’t find them appealing at all until I was strong armed into trying Hot Hubs green smoothie after a hard running workout. For one, I was very thirsty, and two, I didn’t have a choice as my water was gone. So green smoothie it was! Just looking at this glass of green sludge made me want to hurl, let alone the odd smell. I had resolved to drinking a glass of GRASS! I love trying new things, but this… really?

Then, it happened. What appeared to look and smell like grass actually tasted fruity, sweet and very refreshing! With my tail tucked between my legs, I had to admit that what I was drinking, was not bad. Actually, it was REALLY good but I was not about to go THAT far in admitting I was wrong. No, never! So here’s the low down on this cup of powerful blended fruit and greens.

10251948_10203769761268727_8564910358723980675_n

All of the ingredients are raw, natural with no added sugars or juices. As pure as it can get! Are you ready for this?

Kale, Pineapple, Green Apple (I used Granny Smith), Pitted Dates, Ice & a splash of good old H2O. That’s it!

After a good washing , I chop the kale, pineapple  and apple into chunks. Toss all ingredients including dates, ice & a splash of water into your Vitamix (or blender if you don’t have a Vitamix, which I HIGHLY recommend) and blend til smooth. You can play around with the ratios as that’s where your creativity comes into play. It can be runny, thick, or even get wild and add some fresh ginger or add some fresh spinach to the mix or maybe some blueberries! The skies the limit on this, so have fun with it. While it may not look so appetizing, it is truly delicious and kid approved! My youngest who is super picky, loved it and asks for it often as a snack. He has no idea what makes it green, as I haven’t disclosed the ingredients to him. I just told him it was a special apple drink. Gotta be sneaky with kids.

So CHEERS to all things green! Drink up, it’s healthy and OH SO GOOD!

Take 5

Standard

main_23

Take 5…. Seriously…. when you are grocery shopping take 5 minutes or less to read the labels of ingredients on the item(s) you are purchasing. I realize not everyone is going to be freakish as I am about organic, but I recently stumbled upon some new information I want to pass along. Since I pretty much have my “list” of frequently purchased items down to fine science, I don’t have to read every label, every-time.  BUT…. and you knew there was a BUT coming, I recently had to purchase sour cream, and was shocked at what I saw on the label. I won’t mention the brand, however I will say it was a brand of a very well-known grocery store chain. Sour cream should pretty much be milk & cream, and not a whole lot of other additives. The generic grocery store brand of sour cream had a list, several lines long, of not just added ingredients but chemicals as well. I was speechless to say the least. My local super market doesn’t carry “organic sour cream” so I was forced at this time to buy the regular version. *Insert  “Would you like some CHEESE with your whine”? * Here is what I found out.

Just so you don’t think I’m rambling just to hear myself ramble, the proof is in the pudding! Here is a snapshot of the carton of  Daisy Sour Cream:

Daisy2

Notice the ingredients are simply “Cultured Cream, Skim Milk, and Vitamin A Palminate”.

And here are the ingredients of the generic store brand sour cream:

 Cultured Cream, contains less than 1% of: Whey Protein Concentrate, Food Starch-Modified, Sodium Phosphate, Maltodextrin, Cultured Dextrose, Sodium Citrate, Gellan Gum, carrageenan, Guar Gum, Calcium Sulfate, Locust Bean Gum, Potassium Sorbate (to preserve freshness).

WOW, shocking huh? I don’t have a snapshot of the generic brand, but I also didn’t want to throw them under the bus either, so you’ll have to trust me on this. Do the research and READ YOUR LABELS! It’s always better to buy organic, however if you cannot than at the very least, read the labels. I would rather put natural, real food into my body instead of added junk that are not necessary.

This was just an example of many. I have stumbled across other products like this one many times. I was only going to save .30 cents if I bought the generic store brand, which is not a huge savings. I am saving more money by buying better products, less chemicals and additives in the long run as my health is a stake. I feel we all need to be made  more aware of what’s going into our bodies than not. I am thrifty, but not at the expense of my long-term health.

Just some food for thought!

Raw Nourished and Spicy

Standard

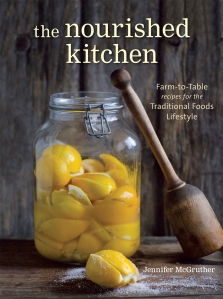
Mundane….. that sums up how my weekly meals were becoming. Very active busy family of five +  not a whole lot of time = mundane meals. Notice I said our meals “were” becoming mundane.  After I pulled myself out of this comatose state I was in, I discovered a whole new world thanks to Nourished Kitchen, Raw Food Rehab, and Raw Food Recipes. I am not necessarily a vegan, or a raw foodie as I would say, BUT I do believe that adding these elements into our diet is extremely important. I am not a big meat or chicken lover but I do try to prepare dishes with them often. So finding out about these websites opened up our options drastically. Not to mention Facebook and Pinterest made this quest for new options a piece of cake! Nourished Kitchen  is more than just a recipe blog and food site. I discovered Moroccan Lemons  on their site along with many other options to spice up our weekly meals. Spicing things up is what we needed! Being I love all things books (kind of nerd in that respect) they’ve recently launched a new cookbook! It’s called “The Nourished Kitchen: Farm- to-Table Recipes for the Traditional Foods Lifestyle”.  Do yourself a favor and check them out when your surfing Facebook. You can find them there as well. They offer a wealth of information along with fabulous pictures!

McGr_Nourished-Kitchen-comp-1

Onto the “Raw” part….. Time to get down and dirty…. Literally. To change things up, and eat more fresh veggies, adding raw was the ticket. I decided to surprise my family, *insert evil laugh*,  one night and make Raw Pad Thai.

Let me back up a minute. My first brush with raw was at a little cafe in Winter Park, Florida called Cafe 118 Degrees.  Hot Hubs (aka Steve) and I decided to live on the edge (really just me but I talked him into it)  for date night one evening. Being it was an all raw restaurant, I convinced Hot Hubs that it was an adventure we’d never forget! Boy was I ever right! Little did we know how our lives would change after this crazy night out. First up, Raw Crackers and Hummus. Don’t remember much about this other than it was delish. Next up, Pad Thai. This sounded like something we could handle. Not too freaky if you know what I mean. To say the dish was exceptional would not do it justice. My taste buds were having a party and even more shocking was that Hot Hubs was actually enjoying it as well. To finish off our evening, we opted for a raw cashew ice cream. There were many choices, but cashew seemed safe. This clinched our evening. The server stopped by several times to check on us, I think she thought we might bolt, and in the end we had her pulling up a chair to chat about all things raw.

Fast forward a few weeks to my attempt to turn my boys onto this new concept of a raw dinner. Never mind that I didnt’ exactly tell them it was raw, but their facial expressions said it all when they realized there was not a trace of chicken and the “noodles” were not cooked. Welcome to all raw baby and the rest is history! Well, not really, as this was just the beginning. Let me introduce you to two of my favorite raw food sites:

Raw Food Rehab

1474518_10152105904474993_525811896_n

and

 Raw Food Recipes

72287_127613507292984_2420719_n

Now we’re cookin’….. or NOT. Both of these sites were a gem for me, as I had felt like I struck gold when I stumbled upon them. Sure I had accomplished making Raw Pad Thai, but I didn’t want to stop there. Both Raw Food Rehab and Raw Food Recipes were a well-spring of information and being they are both on Facebook, it once again made my life 100 times easier. I like the idea of one stop shop social networking, and this made that possible. Click and go! I also love pictures so I can see what I’m attempting to make, and once again these two sites delivered! You know when you absolutely love something, it makes you want to share it with the entire world? Well, I’m very much like that and when I love something, I can’t resist shouting it from the rooftops, and directing people to the proper sites.

It has been almost a year to the date that I decided to spice things up and today we are still going strong. I think most families are super busy, and either honestly  don’t have the time to research fresh and new ideas, or simply get stuck in the same mundane comatose state I found myself in. Adding one meal per week of simply raw into our routine was easy and not as hard as you think thanks to these wonderful sites I stumbled upon. As for myself, I routinely eat a raw breakfast or lunch each day,  and again it’s not hard, it just takes the effort of thinking out of the box! Everyone needs a little SPICE in their life! So what are you waiting for? Spice things up!

Summer Kale Salad Recipe

Standard

971783_10203608163828892_552502682_n

Ahhhh…….. Fresh Kale Salad. Nothing quite like it and it’s so versatile! When most people think of Kale, they associate it with the pretty green “leaf” on their plate when they’ve ordered an entree from a restaurant. That’s now in the past. Kale has come a long way from just entree decor, and is now seen on many plates as salad, or Kale Chips. Here’s the scoop on Kale: It’s loaded full of antioxidants, vitamins, and very high in vitamin K, vitamin C, and rich in Beta Carotene as well as Calcium. Kale has been linked to helping inflammation and has cancer preventive benefits, as well as provide cardiovascular support and has a high level of detox-activating isothiocyanates. Sound good? Let’s get down to the best part…. The Salad!

3-4 Bunches of Organic Kale OR 1 Bag Organic Chopped Kale

1-2 Fresh Organic Lemons

 Organic Olive Oil

Organic Red, Yellow, Orange Peppers, chopped

Organic Onion, chopped

Greek or Black Olives, chopped

Sunflower Seeds

Garlic

Take your chopped Kale ***Stems removed*** and place in a large bowl. Squeeze fresh lemon juice over the Kale and “massage” the leaves for about 5-6 min or until dark green in color and “wilted”. Drizzle with a very small amount of olive oil, and I mean VERY small amount as you don’t want your salad to be soupy. Add chopped peppers, onions, olives, sunflower seeds & garlic. Mix well and refrigerate for several hours. It is BEST when it has sat overnight, but chill at least a few hours before serving. 

Voila! Bon Appetit!

The Wonder of Wonder Mill

Standard

1794728_10203609891032071_282660863_n

Introducing The Wonder Mill. I am about to tell you why everyone should have a Wonder Mill in their kitchen. I realize that not everyone is freaky like I am about all things kitchen, but after this post you just may change your mind. In one of my recent posts “Organic Anyone” I shared how my family and I have made strides to be 95% Organic with our food and cleaning products. With that leap, came major changes. Let’s take a jog off this Wonder Mill path for a moment.

 Have you ever read some of the labels on the food you purchase, like bread, tortillas, corn meal mixes, etc.? I challenge you next time you are grocery shopping, to spend a little extra time doing just that. Let’s start with bread. Most bread, including Honey Whole Wheat  Non High Fructose Corn Syrup, has a mile long list of ingredients in it. MOST of which are “extra” fillers that bread actually doesn’t need but to preserver freshness, those ingredients are added. Here’s what SHOULD be in your bread. Wheat Flour, Oil (olive oil pref) Honey, Water, Egg (opt), Salt, and Yeast. Yep….. that’s IT! If you go to a health food grocery store like Whole Foods, and purchase organic healthy bread, you will be between $6.00 and $8.00 per loaf! And if your like my family, who eats sandwiches every day for lunch, and that’s with teenagers and a husband, it can break the bank! How about corn meal? Have you read what’s in the package of corn meal mix? For starters, the corn is usually a GMO corn, and there is all thing “enriched” added. And in most corn meal packages all you have to do is add liquid ingredients and egg. Why would you want to “enrich” corn meal? Here’s what a basic recipe for corn bread should contain. Corn Meal (plain ground corn) Flour, Salt, Baking Soda, Olive Oil, Egg, Honey, & Milk. Once again that’s it! No other ingredients.

Here’s where the Wonder Mill comes into play. Have you ever seen Coconut Flour, Chickpea Flour, Rice Flour? Those are unusual flours but are becoming quite the rave these days, especially with many Americans realizing that the foods we purchase at grocery stores, are loaded full of CRAP! I have a friend, who mind you has 8 kids, no joke….. Age 14 and under. She invited me to come to her house to learn how to grind wheat berries into flour and make home-made bread. I was intrigued to say the least, after all she has 8 kids and does this!!!!!!

images-1

So we took some wheat berries that looked like what’s posted above, with the Hard Red Wheat Berries on the left and the Hard White on the right. Fired up the Wonder Mill, and within 1 minute or less we had 4.5 cups of wheat flour! I was SOLD! Now to convince hot hubs that we needed this work horse in our kitchen. To sell him fully on the product, I of course took home a home-made loaf of delicious bread. One bite and he was hooked! Here’s how we figured out the savings we would have over a years time if we stopped buying store-bought bread and made our own with freshly milled wheat. The initial cost for the Wonder Mill was $239, and we would be using it to grind many grains not just wheat berries. The cost of a healthy loaf of bread on average is $6.00, and to the cost to make it at home is about .50 cents per loaf! I won’t bore everyone with our budget chart, but being my husband is very analytical, he crunched the numbers and said it was well worth it!

As I mentioned before, we grind more than just wheat berries. You can grind your own corn meal by simply grinding “popping corn” via the Wonder Mill and voila!!!!! Freshly ground corn meal ready to go. Chickpeas, Rice, Black Beans, etc. There are three settings on the Wonder Mill that you can choose from. The Pastry Setting for flours used to bake with, The Bread Setting for bread flour, and Course for things like corn meal. We stopped buying store-bought buns, bread, and rolls and let me tell you…. Once you go home-made, you never go back! Below are some hot dog buns we made recently, and boy were they amazing!!!!! Needless to say they didn’t last long in our house!

10015636_10203569534743189_63281934_n